This is a quick and easy project to do for your child's Halloween Party at school or to make to hand out to trick or treaters that come to your door.

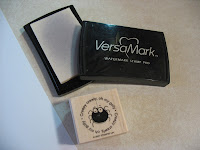
I used the stamp set Batty For You. I used Whisper White, Basic Black, Pumpkin Pie, Green Galore and Lovely Lilac cardstock. I used Basic Black, Pumpkin Pie and VersaMark ink. I also used the Big Shot, Top Note dye cut, 1 3/8 inch circle punch and scallop punch. I also embossed one of the images using VersaMark, black embossing powder and heating gun.

You'll end up with two pieces. Decide which one you want to layer on top then trim the access off that piece trimming along the perforated edge.

Trim along the perforated edge then use your snail adheasive to adhere it to the bottom layer of the Top Note

I used the Frankenstein stamp, inking it using Basic Black then stamping it onto Whisper White

After stamping your image, use your 1 3/8 circle punch to punch out your image

Use your scallop punch to punch out a piece of Basic Black cardstock

Adhere the stamped image piece to your scallop punched out piece

Take the piece and adhere it to your layered Top Note

Next, run a piece of Pumpkin Pie and Basic Black cardstock through your Big Shot using Top Note dye cut

Use your 1 3/8 inch circle punch to punch out the stamped image

After stamping it onto your paper, cover the image using black embossing power shaking off the access to reveal the image.

Use your heat gun to heat up the image to make it pop out. Your image will become shine. Make sure not to keep the heat directly onto the image because your paper will burn. Make sure to constantly move the heat gun all around the image until you notice it becoming shiny.

Use your scallop punch to punch out a piece of Pumpkin Pie cardstock

Adhere the stamped image piece to your scallop Pumpkin Pie piece

Then adhere that piece to your Basic Black Top Note piece

Here is the finished product! I bought small sized jewelry bags from Michaels. After you fill up your bag with your favorite Halloween candy your ready to attach it to the Top Note. Open your Top Note and use your snail adhesive to adhere it to the inside of the Top Note, butting the bag to the crease of the Top Note. Adhere the other end to the bag and your are ready to pass them out!


No comments:
Post a Comment